Difference between revisions of "Example Interpolation"
From BoofCV
Jump to navigationJump to searchm |
m |
||
| (One intermediate revision by the same user not shown) | |||
| Line 11: | Line 11: | ||
Example Code: | Example Code: | ||
* [https://github.com/lessthanoptimal/BoofCV/blob/v0. | * [https://github.com/lessthanoptimal/BoofCV/blob/v0.40/examples/src/main/java/boofcv/examples/imageprocessing/ExampleInterpolation.java ExampleInterpolation.java] | ||
Concepts: | Concepts: | ||
| Line 23: | Line 23: | ||
/** | /** | ||
* Interpolation is used to convert an image, which is discrete by its nature, into a (piecewise) smooth function. | * Interpolation is used to convert an image, which is discrete by its nature, into a (piecewise) smooth function. | ||
* Interpolation is in many CV applications, such as feature detection, and when distorting images. | * Interpolation is in many CV applications, such as feature detection, and when distorting images. In this | ||
* example a low resolution is scaled up using several different techniques to make the differences easily visible. | * example a low resolution is scaled up using several different techniques to make the differences easily visible. | ||
* For computer vision applications bilinear interpolation is almost always used. | * For computer vision applications bilinear interpolation is almost always used. | ||
| Line 35: | Line 35: | ||
// imagePath = "small_sunflower.jpg"; | // imagePath = "small_sunflower.jpg"; | ||
BufferedImage buffered = UtilImageIO. | BufferedImage buffered = UtilImageIO.loadImageNotNull(UtilIO.pathExample(imagePath)); | ||
var gui = new ListDisplayPanel(); | |||
gui.addImage(buffered, "Original"); | gui.addImage(buffered, "Original"); | ||
// For sake of simplicity assume it's a gray scale image. | // For sake of simplicity assume it's a gray scale image. Interpolation functions exist for planar and | ||
// interleaved color images too | // interleaved color images too | ||
GrayF32 input = ConvertBufferedImage.convertFrom(buffered, (GrayF32)null); | GrayF32 input = ConvertBufferedImage.convertFrom(buffered, (GrayF32)null); | ||
| Line 53: | Line 53: | ||
interp.setImage(input); | interp.setImage(input); | ||
// Manually apply scaling to the input image. | // Manually apply scaling to the input image. See FDistort() for a built in function which does | ||
// the same thing and is slightly more efficient | // the same thing and is slightly more efficient | ||
for (int y = 0; y < scaled.height; y++) { | for (int y = 0; y < scaled.height; y++) { | ||
// iterate using the 1D index for added performance. | // iterate using the 1D index for added performance. Altertively there is the set(x,y) operator | ||
int indexScaled = scaled.startIndex + y*scaled.stride; | int indexScaled = scaled.startIndex + y*scaled.stride; | ||
float origY = y*input.height/(float)scaled.height; | float origY = y*input.height/(float)scaled.height; | ||
Latest revision as of 15:06, 17 January 2022
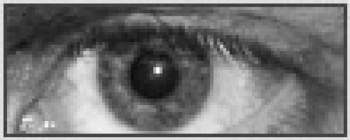
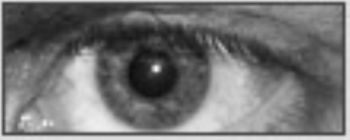
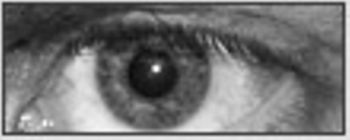
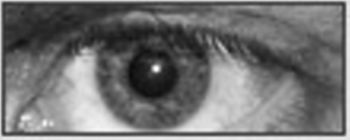
- Enlarging a small image with different interpolation methods
BoofCV provides abstract interfaces to apply different interpolation methods to all of its images. Bilinear is by far the most widely used interpolation method in computer vision.
Example Code:
Concepts:
- Interpolation
- Image Distortion
Example Code
/**
 * Interpolation is used to convert an image, which is discrete by its nature, into a (piecewise) smooth function.
 * Interpolation is in many CV applications, such as feature detection, and when distorting images. In this
 * example a low resolution is scaled up using several different techniques to make the differences easily visible.
 * For computer vision applications bilinear interpolation is almost always used.
 *
 * @author Peter Abeles
 */
public class ExampleInterpolation {
	public static void main( String[] args ) {
		String imagePath;
		imagePath = "eye01.jpg";
//		imagePath = "small_sunflower.jpg";

		BufferedImage buffered = UtilImageIO.loadImageNotNull(UtilIO.pathExample(imagePath));
		var gui = new ListDisplayPanel();

		gui.addImage(buffered, "Original");

		// For sake of simplicity assume it's a gray scale image. Interpolation functions exist for planar and
		// interleaved color images too
		GrayF32 input = ConvertBufferedImage.convertFrom(buffered, (GrayF32)null);
		GrayF32 scaled = input.createNew(500, 500*input.height/input.width);

		for (InterpolationType type : InterpolationType.values()) {
			// Create the single band (gray scale) interpolation function for the input image
			InterpolatePixelS<GrayF32> interp = FactoryInterpolation.
					createPixelS(0, 255, type, BorderType.EXTENDED, input.getDataType());

			// Tell it which image is being interpolated
			interp.setImage(input);

			// Manually apply scaling to the input image. See FDistort() for a built in function which does
			// the same thing and is slightly more efficient
			for (int y = 0; y < scaled.height; y++) {
				// iterate using the 1D index for added performance. Altertively there is the set(x,y) operator
				int indexScaled = scaled.startIndex + y*scaled.stride;
				float origY = y*input.height/(float)scaled.height;

				for (int x = 0; x < scaled.width; x++) {
					float origX = x*input.width/(float)scaled.width;

					scaled.data[indexScaled++] = interp.get(origX, origY);
				}
			}

			// Add the results to the output
			BufferedImage out = ConvertBufferedImage.convertTo(scaled, null, true);
			gui.addImage(out, type.toString());
		}

		ShowImages.showWindow(gui, "Example Interpolation", true);
	}
}


